Some people are born with so much talent but are unable to convert that into tangible goodness because of either a lack of confidence or the absence of knowledge that can lead them to greatness. Music composition is an industry where a lot of people with talent lose out on opportunities because they don’t know how to do some basic things like recording songs and uploading them onto platforms where people can listen to them.
If you are passionate about music and want to learn how to record a song, you have found yourself in the right place. All you need to do is keep reading! Interested in learning how to write lyrics to a song? Check out our other articles.

Music Composition 101: How to Record a Song at Home
This section will look at all the major steps associated with recording your own music — specifically a song. While the process may differ a little depending on the equipment and technology that you are using, it will remain similar to this, so keep reading!
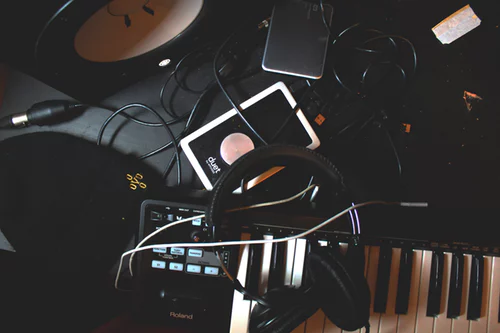
1) Setting up a Home Recording Studio
While most people feel scared at the very mention of the term studio, it isn’t too difficult to set up a small unit at home where you can carry out all your recording work.
If you want to record a professional-grade song, you need to invest in some equipment — for example, a basic home studio has
Computer or Laptop
Headphones
Mic and Pop Filter
Instruments
Amplifiers
Studio Monitors
A DAW or Digital Audio Workstation
Audio Interface
Virtual Instruments
Acoustic Treatment
2) Choosing the Best DAW (Digital Audio Workstation)
You need a computer that is fast and has enough memory to handle your DAW or digital audio workstation.
Mac users can use the in-built GarageBand but others can download some of the other popular software that is easy to use and not unnecessarily complicated.
If you are just getting started, you want to go in for simplicity and work your way around.
3) Deciding on What You Want to Record
A song isn’t something that just comes together in a day. You will have to organize the track that you are planning to record by delving deeper into the different elements that will make up that particular song.
This includes the base track, rhythm, harmony, melody, background vocals, and more.
4) Setting up and Organizing Studio Equipment
When you are done organizing the track and it is finally recording day, it is important that you put together all the different instruments and supporting equipment like cables, amplifiers, and so on.
Getting organized means maximum creativity flows. Have everything you need at arm’s length.
If you are looking to produce content that is close to professional standards, you may want to link these to an audio interface and not just your computer.
5) Building the Base Track
After the equipment is in place, you will have to build the foundation of your track — also referred to as the beat — with the help of a base track.
This is meant to act as the guide that the instruments — for example, the drums, the stringed instruments, and so on — will be able to follow.
You can record your own or download it from another platform.
6) Recording the Rhythm
The actual process of recording begins with the rhythmic instruments that you have chosen.
You need to turn on the record button and listen to the base track with the help of your headphones as you play the instrument.
It is important that ambient sound isn’t blocked completely by the headphones or you won’t be able to hear yourself.
7) Recording the Harmonies
The harmony can vary depending on the song that you are recording.
If there is more than one instrument that forms the harmony, you will need to record them separately, usually with the help of different mics.
While they will be recorded as individual tracks, they can be put together to form your background score.
8) Recording the Melodies
Recording the melody for the song is the next step. This will form the main part of the harmonized music, which means that till includes the lead guitars and vocals.
After setting up the lead, it is important that you add the fills or supporting melodies.
There is a lot of scope for playing around at this time and if you don’t like the individual rhythm, harmony, and melody combination, you can remove and redo it.
9) Addition of Color and Effects
The best part of a digitalized system is that you get a lot of control over the small intricacies that are involved in recording a song.
Listen to your song and check whether or not you are satisfied with it.
While it may already sound good, you can add some fills and sound effects as finishing touches to the song.
10) Cleaning Up
Recording in a studio is preferred over recording a live performance because of the degree of flexibility that is associated with it.
You can use this time to choose the best parts of the tracks that you want to use so that you have a product that is ready to go in for mixing.
11) Mixing down the Track
Use your production software to keep track of all the different elements that have come together to make up the final song that you have at hand.
This helps separate any errors that you hear. Tasks like balancing channel levels, equalization, reverb, compression, and more are carried out in this stage.
12) Exporting and Preparing for Distribution
This brings us to the final step, which is exporting the track. While this process is quite simple when it comes to digital formats, if you are looking to export the track to a CD, you may need some additional help from an audio engineer.
The process of recording a song is quite uncomplicated if you look at it objectively.
However, you may have to go through a series of trial and error experiments before you zero in on the exact process that works best for you.
The steps mentioned above are a good place for you to get started so there is no need to delay your music recording endeavors further!


